Slight of Hand: The Art of Concealer
The what, where and how guide to concealing.
Between all of the different formulas and shades I carry, I think I have well over 100 different concealers in my work kit. This is because they are all slightly different and frankly there are so many different needs for concealers. I also work with many different people—and I like to be prepared—but obviously you just need to find one or two that are perfect for you.
SPOT COVERAGE: HOW TO CONCEAL PIMPLES & HYPERPIGMENTATION
Covering spots—whether active breakouts or post-inflammatory hyperpigmentation (those pesky dark spots left after a pimple heals)—requires the right concealer type and technique.
For blemishes, you’ll want a concealer that:
- Has a stickier, drier formula that adheres to the skin.
- Is matte, ensuring it blends seamlessly with foundation.
- Matches your skin tone closely for a natural finish.
A drier cream concealer such as the Spot Stick Concealer by Jillian Dempsey will adhere to the offending area and stay put longer, especially if it’s very raised and the skin is a little stretched. Most liquid or cream concealers will slide right off it.
Pro Tip: Set your concealer with a light dusting of powder to ensure longevity and prevent it from sliding off.
For dark spots left behind after breakouts:
- Use a concealer that matches your foundation’s finish (matte or radiant).
- Opt for formulas that work with your skin type—whether creamy, liquid, or dry.
KEY TAKEAWAY: You can use a variety of concealers: creamy, liquid, dry, whatever works best for your skin. I will say if you wear foundation, match the concealer finish to the foundation finish meaning that if your foundation is matte, don’t use a radiant concealer and vice versa. You want to “marry” the areas together so they’re seamless, and mixing mattes and luminizing formulas will break that illusion.
UNDER THE EYES: ADDRESSING DARKNESS, PUFFINESS & FINE LINES
Under the eyes is a whole different ballgame. (This will be the only sports metaphor I ever use, just so you know). The area under the eyes can be lighter, darker, grayer, more blue, more purple, more brown, puffier or more sunken than other parts of the face. Add fine lines or deep wrinkles to the equation and you have a recipe for a very long reply from me. But in a nutshell, the concealer you use under the eyes is most likely not going to be the concealer you use for pimples, especially as you get older and the skin gets thinner and it becomes more about color correcting.
CHOOSING THE RIGHT FORMULA
For under-eye concealing, opt for:
- Light-reflecting formulas to add radiance (avoid if you have substantial puffiness).
- Hydrating concealers that won’t settle into fine lines.
A gently, and I mean gently, luminous under eye concealer like Sisley's Stylo Lumière can do wonders. It can softly reflect and diffuse light adding a blurring, light reflecting radiance to the area.
Avoid if: You have puffiness, as reflective formulas can emphasize the area rather than diminish it.
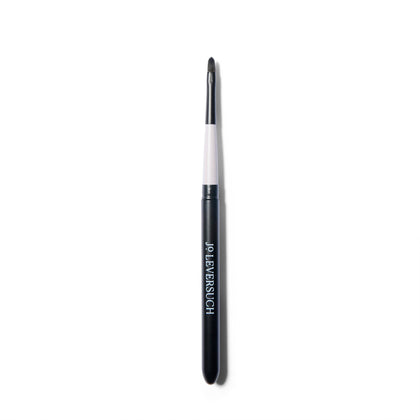
THE IMPORTANCE OF BRUSH SHAPE
The right application tool makes a big difference. Different brush shapes and densities affect coverage and blending.
For the under eye area I prefer to use a wide, flat, tapered brush. This lets me lay down concealer with precision while also perfectly blending out the product to the surrounding skin.
For covering spots and scars, I use a brush with a small surface area for precision coverage. This way I can blend it seamlessly into the surrounding skin.
Pro Tip: Use gentle patting motions instead of swiping to avoid disrupting your foundation.
COLOR CORRECTING
Color correcting can make a dramatic difference in neutralizing discoloration under the eyes. The right corrector shade depends on your skin tone and the undertones of your discoloration.
Choosing the right color corrector:
- Peach tones: Counteract blue/purple hues (ideal for lighter skin tones).
- Orange tones: Work well for warmer, deeper skin tones to prevent ashy results.
- Red tones: Best for rich, deep skin tones to brighten without looking gray.
Let me use myself as an example. I wear little to no foundation in my daily life but under my eyes the skin is lighter and has a slight blue cast with a few brownish areas which can make me look tired even after a full 8 hours of sleep. I use a slightly golden concealer under my eyes to “connect” the skin on my face to the skin under my eyes. Anything too peachy looks too pale as I have ruddy undertones, so I need colors that have more yellow/gold than peach. Complicated, for sure. It involves some trial and error until you find your holy grail product, but when you do, you’ll be thrilled with the results.
I hesitate to recommend particular products because I find the right formula to be pretty specific for each persons needs, but I will recommend a few that I think are worth researching.
- For undereye: Sisley Stylo Lumière
- For under eye color correction: Sisely Photo Cernes Éclat, Haus Labs Triclone Skin Tech & Fenty Bright Fix Eye Brightener
- For light concealing: Radiant Creamy Concealers from NARS & Pro Filt’r from Fenty
- For flat spot concealing: MILK Future Fluid All Over Cream Concealer
- For raised pimple concealing: Jillian Dempsey Spot Stick Concealer & Laura Mercier Secret Camouflage Concealer
Concealer is one of those products that you’ll have some trial and error with. What works for you in your 20’s & 30’s will be different than what you need in your 50’s & 60’s so be prepared to experiment until you find what’s just right for you. It may be a little time consuming, but it’s worth doing the research for as the results truly make a difference.