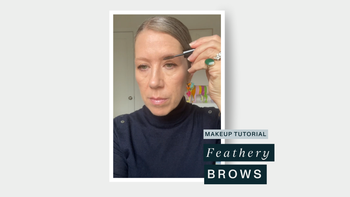
If I had to choose a desert island product (besides lip balm, that should be regulation) it would be mascara. I feel like there's no other beauty product that really has the same impact as a good, defined, fluffy lash. If eyes are the window to the soul, lashes are the lovely flowers along the path to the front door.
Fiona's tips for the most luscious lashes
STEP 1:
CURL YOUR LASHES
Sometimes people ask if this is necessary and before they can even finish their sentence I'm already saying enthusiastically "YES!" A lash curler truly opens your eyes, and wide open eyes have more light hitting them, making them twinklier and more engaging.
You should know that not all lash curlers are made equal, using the right one makes the difference between a pass and a fail in Lash Class. The construction and design matters and the Japanese-crafted Surratt lash curler has the right torque to get a strong curl and a good angle.
Some people prefer to curl after mascara but I find this A. dents the mascara and B. can make the angle of the lashes artificial and severe looking. Too cranked. Too right angled. I'm firmly Team Before Mascara—just follow these steps to the perfect lash.
Start with a clean, dry lash—damp lashes won't hold the curl. Get the lash curler right to the base of the lashes and give a good squeeze, pumping the curler a few times to ensure the connection. You can "walk" the curler out go give a softer curl, squeezing along the way towards the tip of the lash.
Troubleshooting: If you have straight lashes, one or two wayward straight ones or lashes that are straight at the outer corners, you just need the right tools and a little elbow grease. A precision lash curler (like the one from Prima) lets you target the stubborn lashes, applying ample pressure where needed versus across the entire lash. Pair the Prima curler with a waterproof mascara—which holds a curl better than regular mascara—and you've got yourself an obedient, open lash.
STEP 2:
THE INVISIBLE EYELINER
Use a waterproof long-wearing eyeliner to "tightline" the upper waterline. Tightlining is when you use an eyeliner along the space where your lashes extend out of the upper waterline (the waterline is the skin along your eyelid closest to the eyeball). By darkening this area you make the lashes look thicker and more full. You're essentially darkening the space between your lashes, filling in the gaps and making it look like you're wearing eyeliner without using any of the real estate of your upper lid. This can serve to make your eyes look more defined without closing them up, and is especially helpful for those with hooded eyes.
STEP 3:
PRECISE APPLICATION
Getting mascara right into the root of your lashes makes your lashes look thicker and fuller. For blondes this is especially true as lashes for blondes can often have a lightness near the root, making the lashes look like they're "floating" off the lid. That inky layer pushed into the lash line can really do a lot of heavy lifting by defining the lashes, without eyeliner or eyeshadow.
Hold the wand horizontally and wiggle the wand into the roots, then pull the wand upwards towards the tips of the lashes. Use the tip of the wand to coat the lashes at the inner corner and to fan out the lashes at the outer corner. If you missed a little mascara at the ends "tip" the lashes with a bit more mascara to define.
Wipe the spoolie with a tissue or paper towel (paper towels are less linty) before you apply mascara to the bottom lashes. This way you can slowly build to the coverage you want and minimize the spider lash effect (but no judgement if that's your thing. Personally I love a heavy, spiky lash).
Wait a little bit for the first coat to settle and go back and apply another round. Wait too long and the mascara hardens, resulting in clumpy lashes, exaggerating what's already there. Apply the second coat too soon and it will be too runny to actually thicken the lash. Waiting until it's dried a little lets you build the product while still having the flexibility to manipulate the lash, creating a fluffier effect.
STEP 4:
LEVEL UP YOUR LASHES WITH FALSIES
The most modern and undetectable way to wear a lash cluster is underneath your top lashes. While this may sound confusing, the effect is very beautiful and nearly undetectable when you're wearing them.
Apply a thin coat of lash glue to the top of the seam of the lashes cluster (you would apply it to the bottom if you were putting the clusters on top of your lash). Wait a few moments for the glue to get tacky and then—holding them by the tip of the lashes with a lash applicator—push them up onto the base of your lashes near the lash line. They should adhere easily. Apply a few clusters sprinkled along the lash line and wait a few minutes for the glue to dry, squeeze the lashes between the lash applicator to bind them to your natural lash, then apply mascara.
Troubleshooting: If the lash slides off when you put on your mascara the glue is still too wet so add a little more glue, wait for it to get tacky and reapply it. Just wait another minute or so before mascara.
Troubleshooting: If you get a little mascara on your lid or around your eye use a tiny, tightly wound cotton bud dipped in Micellar water, eye makeup remover or a light moisturizer to clean it up. Q-Tips have looser fibers which means the fluff can get stuck in your lashes and be incredibly annoying. A small, tightly wound cotton bud allows for precision clean up without the unwanted fluff.