
Baggage Claim
A step by step for concealing under eye bags.
Firstly, please check Beauty Lessons no. 6 for a deep dive on concealers in general. I talk at length about under eye color correcting and good concealers for the area, so that’s a great place for resources.
Ah genetics. I hope whoever you inherited this area from also blessed you genetically with one of your favorites features or qualities.
I’m sure you know that puffy under eye bags are tricky because of the dimensionality of the area, the skin is pulled taut and is raised so the strategy for camouflaging them is different than dark circles. You may even find that the skin is lighter or a different under tone than the surrounding skin. If this is the case, just adding concealer to the area will actually highlight it and make it more noticeable.
STEP 1.
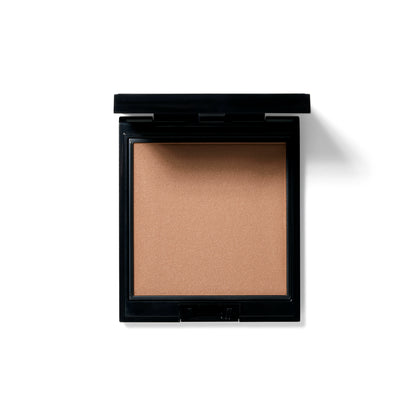
The first thing you want to do it use a tiny bit of matte cream bronzer - and matte is very important - before you apply your concealer. This trick can work wonders. You don’t need much, just pat a very thin layer on with your fingertips. This warms the area up and helps it recede slightly and evens out the skin tone so that when you add concealer it doesn’t look too pale and prominent.
I really like the Makeup By Mario Softsculpt Shaping Stick, the colors have a subtle olive undertone to many of the shades so they don’t read orange and the formula is east to work with. You'll then apply foundation and or concealer on top to marry the tones together.
On the main area of the bags, make sure you aren’t using a radiant or luminous concealer, this will only catch the light and make the bags more noticeable. So find a concealer that matches your skin tone and make sure it’s a formula with zero shimmer.
STEP 2.
You’ll also need to use a bit of visual trickery to minimize the area. For this step, take a small, fine tipped concealer brush (or a lip brush or eyeliner brush, so long as it’s small and precise) and use a slightly lighter concealer to highlight underneath the area to visually flatten it out. In this area you can use a gently luminous product like the YSL Touché Eclat to lighten and brighten (there are also a good amount of dupes out there).
STEP 3.
If that area is brownish or purple you’ll need to do a little color correcting (again, please refer to Beauty Lessons No. 6 for some product recommendations.) Essentially you’re trying to reduce the depth of the shadows created by the bags. The key to all makeup is blending so make sure it’s blended well to ensure the transition is seamless. You can use a fluffy eyeshadow brush to blur and blend the area flawlessly or a small Beautyblender®. Either way the goal is for the transition to be seamless.
I can’t say that these tips will miraculously make your under eye area smooth and bag-free, but they should work to minimize them. It make take a little trial and error, but I’m confident that armed with this information you can make a difference in how you look and feel.

