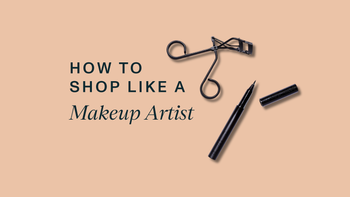
The ABC’s of Blush
ie: Apples. Brushes. Cheekbones.
Makeup can be intimidating, but when you’re armed with the right products, a handful of good tools and a bit of know-how, you’d be surprised at how easy it can be to achieve show stopping results.
Here are a few helpful tips to help you navigate the how-to’s of applying blush, bronzer and contour like a pro.
BLUSH PLACEMENT: APPLES VS. CHEEKBONES
There’s a blush feud happening. Not sure if you’ve dialed into it but there are two camps these days: Team Apples and Team Cheekbones (and there’s also “boyfriend blush” but that kind of came and went in a Tik-Tok fever). While I’m a firm believer in "there are no rules in makeup," there are guidelines that are helpful.
-
Apples of the Cheeks: The apples of your cheeks are the area that’s the most prominent when you smile, centered directly under the eye. Blush applied there feels fresh and girlish and plump. Instantly wholesome.
-
Cheekbones: By applying blush to the tops of the cheekbones instead of the apples, the effect is to create more of a lift to the face. Start the blush at the halfway mark of your eye (under the pupil) and sweep up to just past the outer corner of your eye. Be sure to blend extremely well so it really feels like a flush and not an 80’s flashback.
Pro Tip: As you get older, your fat pads shift lower and aren’t as full. Using the technique of applying blush a bit higher can visually lift the face. This is especially helpful if you have a longer or rectangular face. Not sure of your face shape? Using a lip liner or eye liner, look in the mirror and trace the perimeter of your face. Step back. What shape did you draw? Heart? Round? Oval? Oblong? Square? Now you know your face shape.
THE DELIVERY SYSTEM
For Cream or Liquid Blush:
For cream or liquid products I reach for a dense synthetic brush. The way the bristles are packed together aid in distributing the color evenly, helping it blend into the skin - and other products - seamlessly. There are a lot of different shapes that you can choose from and I’m not particular; I like them domed, angled, flat, you name it, it’s the density that’s key. BK Brushes make really stellar synthetic brushes in great shapes and they’re all staples in my kit. They’re also quite affordable which is a bonus.
For Powder Blush or Bronzer:
For powder blush and bronzer you want a brush that’s looser and less densely packed so you can gently disperse the color, ensuring that it isn’t blotchy or patchy. Look for a brush that’s a little bit fluffy and not too pointy. This is especially true for bronzer as you want it to feel ultra diffused, so look for a brush that’s a little larger that has a bit of “flop” to it; it should have a little “jiggle" when you give it a shake. This ensures that it won’t deposit too much product in one spot when you apply it.
Also, always tap the excess product off your brush before applying a powder product to your face—it’s easier to apply a bit more than to correct a heavy application.
BRONZER PLACEMENT: BRONZER VS. CONTOUR
Makeup has gotten a lot more sophisticated in recent days, and everyone is suddenly supposed to be an expert, but that can feel like a heavy expectation. I see a lot of confusion about the difference between bronzer and contour so let me help clarify.
Contour:
The purpose of contour is to create a shadow or visually push an area back. For example, using contour under your cheekbones to sculpt the face, the crease of the eye to add depth or the sides of the nose to slim or reshape it.
Bronzer:
The purpose of bronzer is to add warmth, to add a kiss of sun to the face. Applying bronzer to the tops of cheekbones, sweeping a light dusting across the bridge of the nose, and a touch along the hairline warms the face while also creating a bit of shape.
Bronzers are warm and often have shimmer - shimmer on the high points of the face brings light to the area and pairs well with the warm tones of the bronzer. Contour should be matte or at the very most have a very subtle sheen. You’re trying to create a shadow; if there’s shimmer it will destroy the illusion.
Pro Tip: If you’re very fair, even the lightest bronzer can read orange. On my palest clients I use a very milky toned contour in place of bronzer (just be sure it isn’t too grey). If they need a touch of warmth I’ll mix a cream contour and cream bronzer to customize the right shade - mixing creams is infinitely easier than layering powder products.
HOW TO LAYER BLUSH AND BRONZER
Layering blush and bronzer is a winning combo. Start by softly warming the perimeter of the face and add an extra sweep of color along the tops of the cheekbones. Swirl a bit of a bright, happy blush color onto the cheeks for the effect of having just played a vigorous round of tennis on a sunny August day.
Pro Tip: Want to rev up your cream blush? On the back of your hand mix your cream blush with a cream highlighter to create a custom radiant blush. Add a touch of rich moisturizer for a extra dose of radiance.